Posts

Showing posts from June, 2019

Pink Birthday

Image
Hi all Made another card using the rose dies and punches. Here are the steps 1. It is a square card, die cut the roses and colored using water color pencils. Placed diecuts so it covers the punched portions .  2. Diecut pippi butterfly from memory box and covered it with gold pattern paper.  3. Die cut the sentiment 4 times so that it gives some dimension and lastly added a rhinestone.  Linking to  seize the birthday challenge Hndmd challenge Hope you like it Thanks Kavitha vadhri

Butterfly Thanks

Image
Hi all Made few cards before going on vacation. I saw a sketch at Freshly made sketches and wanted to play along. I also saw the colors at color throwdown and wanted to combine two of them. Here are the steps  1.First i embossed the white cardstock with Darice embossing folder. 2. Stamped a butterfly, colored using CARANDACHE water color pencils ,heat embossed using clear embossing powder . 3. I distressed a blue cardstock using faded jeans as i donot have the color mentioned in the challenge.I die cut word thanks and clear embossed.I diecut the word such that it still is attached to the cardstock. 4.Then diecut honeycomb pattern 3 times for dimension and with foam dots pasted the hexagonal pattern which is cut from pattern paper and all is pasted on the grey pattern paper. Linking to 1. Freshly made sketches  2, color throwdown challenge Hope you all like it .  Thanks Kavitha vadhri

Pineapple Thanks

Image
Hi all  Made a card using the inspiration photo from Paper smooches June challenge. I had thought of  the daisies and chevron after seeing the spikes of pineapple. Here are the steps for the card 1. Diecut the white cardstock using stitched rectangle die.  2.Embossed more than half of the card with chevron embossing folder.  3.Distressed a cardstock with rasberry and mustard seed and diecut daisies.For the leaf i used paper smooches loopy leaf die which was actually found in my scraps. I think i was supposed to do a background with distress inks green and yellow followed by stenciling of the pattern ,which i did not like and i thought of cutting the leafs instead of throwing. Finally put in to use now.  4. Sentiment is from the hope stampset which is also from Papersmooches. I remembered that i won this stampset in the challenge by savanaah long back , i recollected only when going through old posts as i started crafting after 4 yrs now.   Linking to Papersmooches june

Hibiscus Anniversary wishes

Image
Hi all Made my first masking card. It seems challenges make me think more and active. So thought i would participate more often and try new techniques even though i feel my stamping is pretty basic. Now that i gradually feeling good when stamping(no fear) ,i wanted to try out more.  Here are the steps for the cardmaking 1. I stamped the hibiscus (mudra stamps from India) randomly with versafine black ink and heat embossed with clear embossing powder and started wetting the paper followed by coloring with watercolors.  2. Stamped the leaves with versamark and heat embossed with pearl green embossing powder.  3. I found that after coloring my flowers were not as bright as they were first before coloring so tried stamping again with versafine and clear embossed. As i didnot have MISTI it was hard to stamp properly as my cardstock also curled up with coloring but finally stamped properly except two which you can see in the card.  I would have thrown the card in my scrap

Anniversary Love

Image
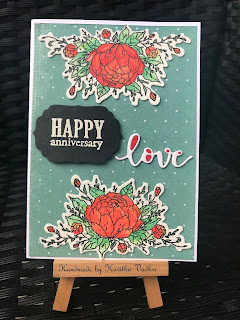
 Hi Made an anniversary card with a lovely pattern paper and diecuts. Coloured the diecut roses using Watercolor pencils. Making the two opposite flowers look same when coloring was a big task for me. Finally satisfied with my second attempt of coloring. will share my first card in my next blogpost.Added two layers of flower diecuts. Embossed the sentiment , added 3 layers of LOVE diecut. Submitting to 1. watercooler challenges 2. Simon says challenge 3. Happy Little stampers 4.D ouble D challenge 5. Craft stamper 6. Inkspirational  Flowers from Garden Hope you all like it. Thanks for visiting my blog. kavitha vadhri

First One layer card

Image
Hi all Made a one layer card first time. Its a simple card but i always had fear of stamping on the cardstock but finally happy with the outcome that too with first attempt.  Stamped the swirls and butterfly with versamark ink and clear embossed the image. Felt this sentiment will be appropriate as the swirls had hearts. will take a pic in the sun tomorrow so that  the shine due to embossing on the card is visible. Submitting to the following challenges. 1. Timeout challenges 2. aaacard challenges   Thanks for taking time and visiting my blog and commenting Kavitha vadhri

Rainbow baby card

Image
 Hi all Made a quick card for fusion challenge. I used both the sketch and colors. Here are the steps. 1. At first i distressed the cardstock with various colors and sprinkled some water. 2. Die cut the squares and put the embossed cardstock to the back of the square. 3. Die cut and colored the images which are clearlybesotted stamps , stuck using foam squares. 4. Stamped the background with versamark and star stamp, clear embossed them. 5. Finally embossed the sentiment on black cardstock. Submitting to 1. Fusion challenge Kavitha vadhri

2 Bestwishes

Image
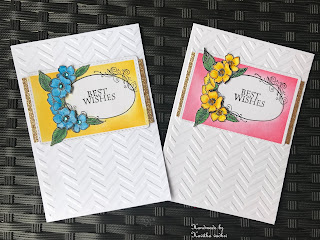
Hi all Made two cards using the freshly made sketch. Here are the steps 1. Dry Embossed directly on the card.  2.Stamped sentiment ,heat embossed using clear embossing powder and distressed the cardstock .  3. Heat embossed and colored the flowers using Carandache pencils. Added the golden cardstock so it matches the sketch. Finally added rhinestones.  Participating in the following challenges. 1. Freshly made sketches 2. Timeout challenges.  Used flowers from Nature

Border using sentiments

Image
Hi all Just in time for the challenges. Was thinking a CAS card for a while as Iam not used to do such cards, when suddenly got a thought to make a border using sentiments.  Here are the steps. 1. First stamped the sentiment around the cardstock and clear embossed it. 2.Die cut Happy ,friend and placed a distressed cardstock on the back of it.  3.Took a long time to decide whether to make shaker or not but thought the color will not be visible if it is shaker card so just put an acetate sheet under it.  4. Cut birthday die cut 4 times and pasted, finally added a love rhinestone. Participating in the following challenges  1. AAAcardchallenges 2.  Diecut Divas challenge blog 3. Addicted to stamps and more 4. Seize the birthday 5 craftstamper Hope you like my first attempt of CAS card Thanks for visiting Kavitha vadhri